Enhance hexo with PWA in three steps
Comment | 0View
In previous article I mention about reviewing issue and my PWA plan will be advanced. I want to learn fist and do some experiment about PWA, so this blog became the first tester.
PWA needs HTTPS supports for the whole site. Luckily this site is hosted in Github Pages, is means Github does all the HTTPS things for me so that I don’t need to worry about. So in the blog, HTTPS section is not in the scope of this discussion.
1. Installing dependency
What I’m using here is a node package called hexo-pwa, install it with this command:
1 | npm i hexo-pwa --save |
2. Createing Config
Now we need to add some config to your hexo config file (not the theme config).
Open _config.yml and add these lines:
1 | pwa: |
You can look up hexo-pwa‘s documentation for more information.
3. Deploying
1 | hexo clean && hexo g && hexo d |
And see how it become:
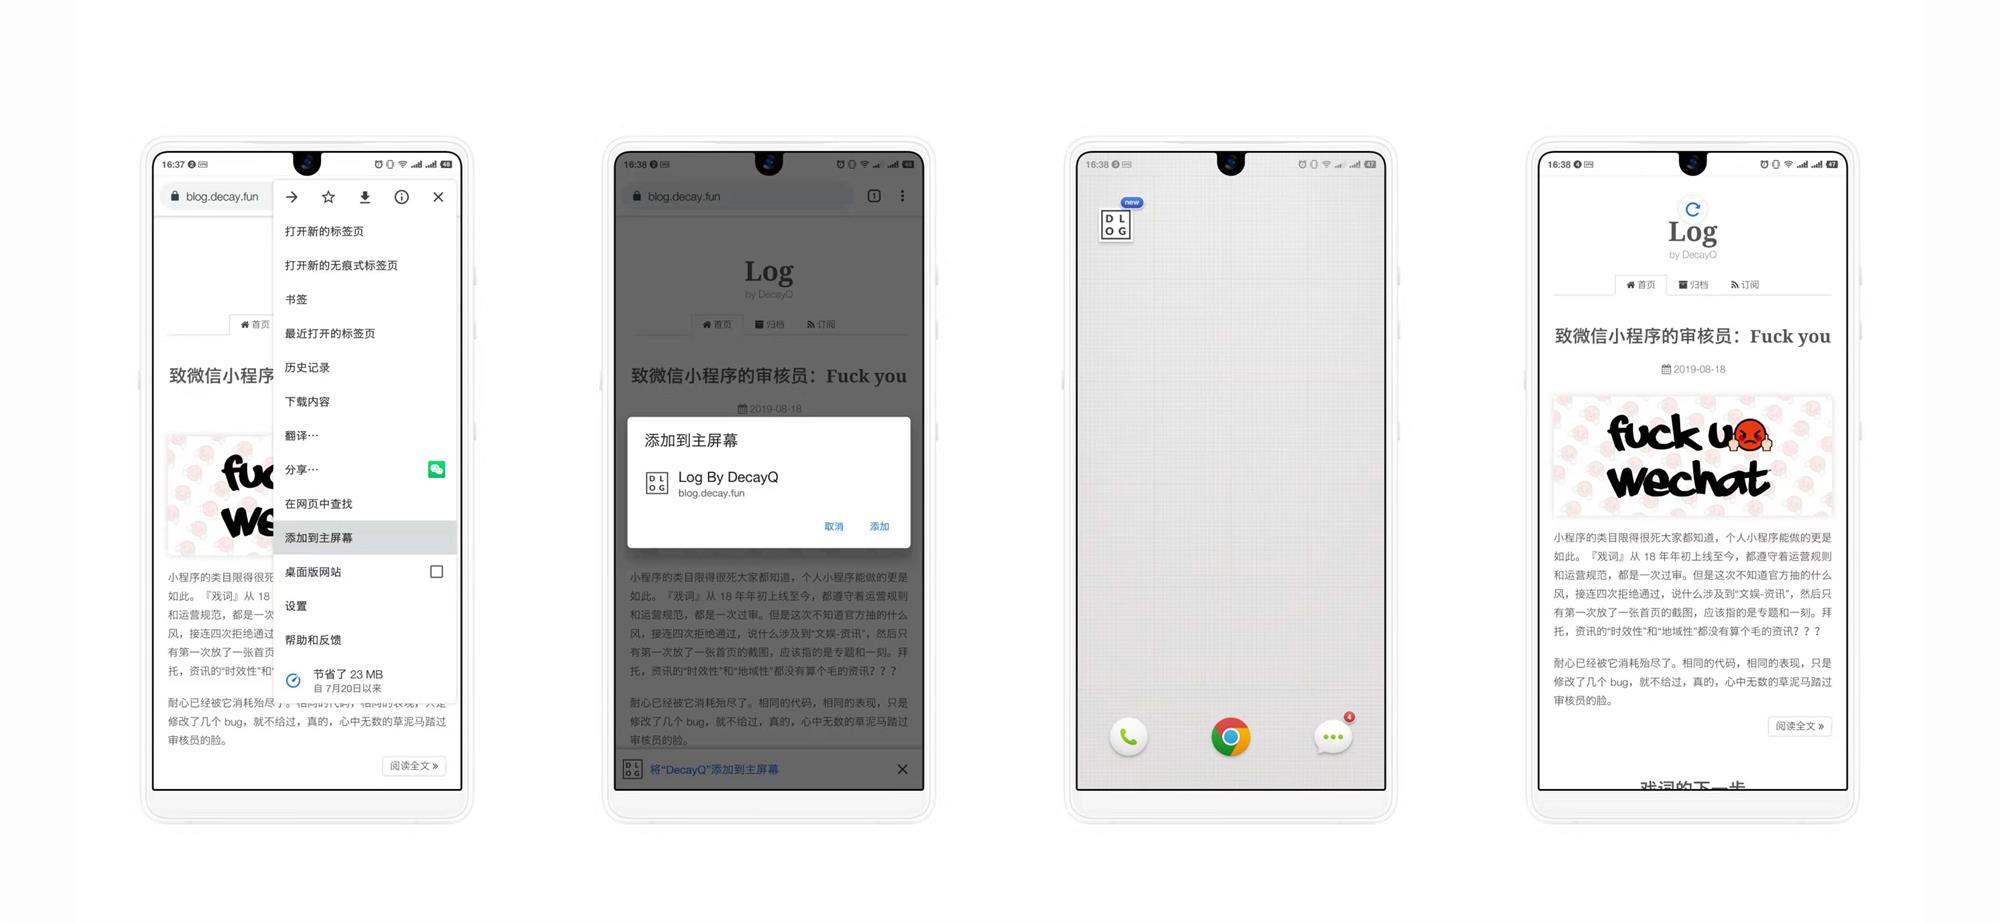
Mobile
Desktop
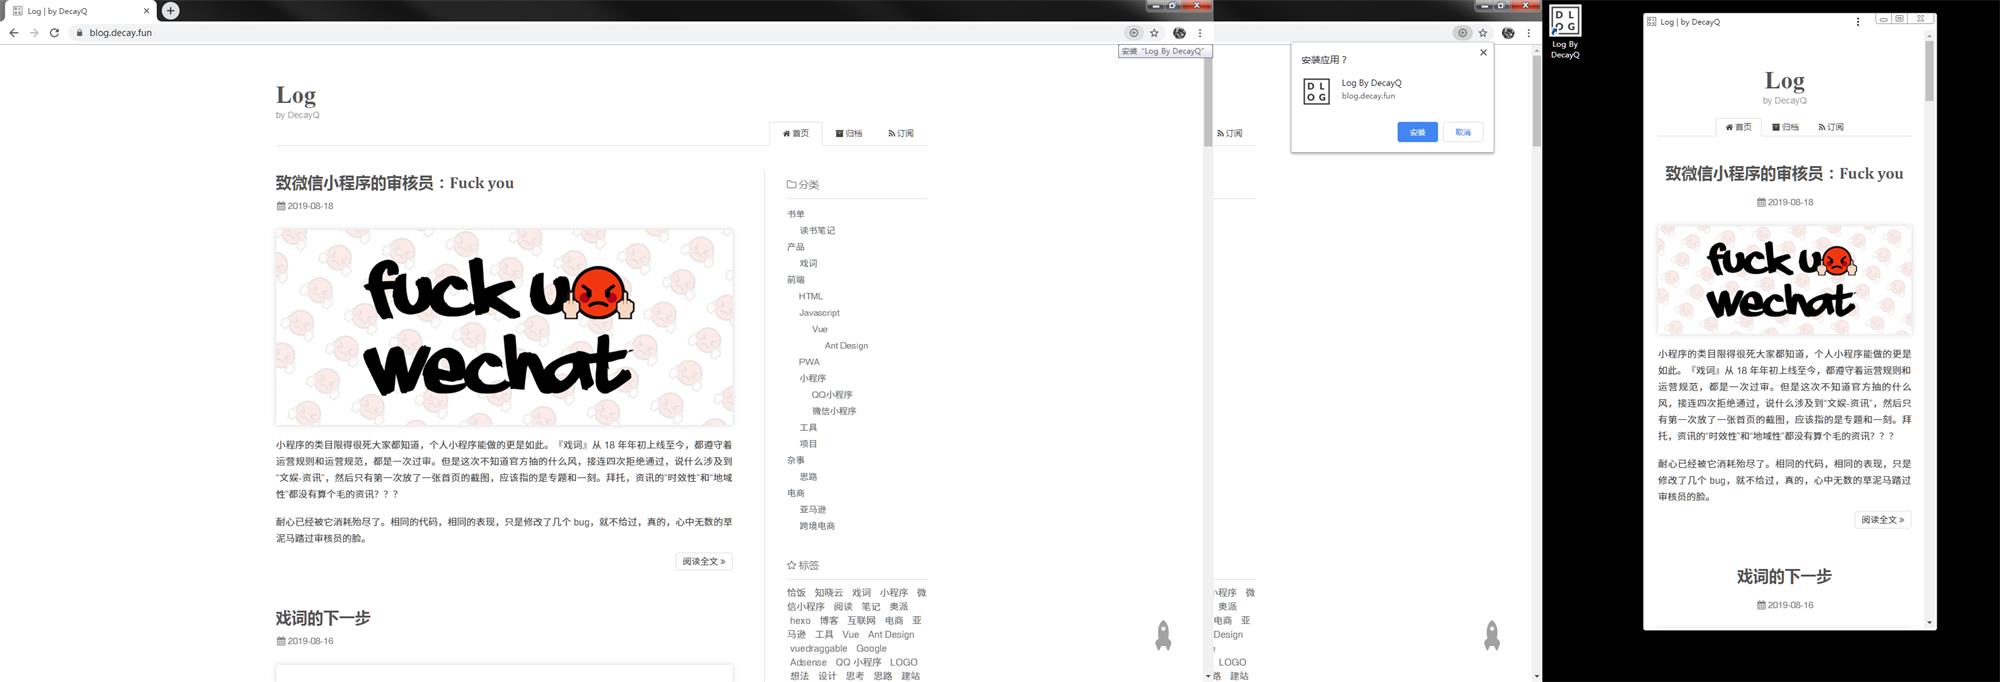
Now you can use your browser (Chrome/Firefox) to view this site. Clicking the up-right menu and add this site to your home screen.
Hope you enjoy.
- Blog Link: https://blog.decay.fun/en/2019/08/19/enhance-hexo-with-pwa-in-three-steps/
- Copyright Declaration: The author owns the copyright. Please indicate the source reproduced!
Share用中文浏览本文